


How to Make Artificial Plants Look More Realistic
Bringing greenery indoors elevates any space, but maintaining live plants isn’t always practical. Modern artificial plants offer a perfect, maintenance-free solution, provided we know how to style them correctly. To truly elevate our decor and ground the illusion, we recommend laying down real soil or stones at the bottom of the pot to make our artificial plants blend more seamlessly into our indoor space.
Start With High-Quality Faux Plants
The foundation of a believable display is the plant itself. Low-grade plastics reflect light unnaturally and instantly give away the secret.
- Prioritize Texture: Look for matte finishes, natural color variations, and detailed veining.
- Invest in Premium Materials: Silk, high-grade polyethylene, or real-touch fabrics provide the best aesthetic return on investment.
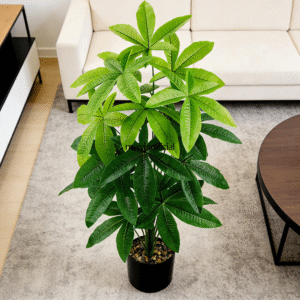
- Inspect the Trunk: A realistic trunk or stem with simulated bark or natural wood elements is crucial for authenticity.
Shape and Arrange the Leaves
Right out of the box, faux plants look stiff and compressed. They require careful “fluffing” to mimic organic aesthetic patterns.
- Bend the Stems: Gently curve branches outward and downward to create a gentle, natural drape.
- Angle the Foliage: Rotate leaves so they face outward and upward toward the light source.
- Embrace Asymmetry: Perfect symmetry looks engineered. Let some branches droop slightly or cross over others to replicate natural imperfections.
Utilize Natural Lighting Setup
Lighting dictates how the eye perceives our greenery. Even the highest-quality faux plant will look out of place shoved into a dark closet or a windowless corner where a real plant would immediately fail.
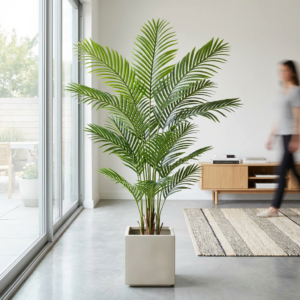
- Strategic Placement: Position our faux greenery near windows, skylights, or glass doors.
- Create Dynamic Shadows: Allow natural sunlight to hit the plant and cast realistic shadows through the leaves. This interplay of light and dark strongly reinforces the illusion of life.
Choosing the Perfect Pot for Your Faux Plant
When styling faux greenery in a home or office, the container we choose is just as important as the plant itself. A great planter grounds the arrangement and completes the illusion of a botanical display.
Sizing the Planter Correctly
Getting the proportions right is crucial. If the pot is too small, the setup looks top-heavy and obviously fake. If it’s too large, the greenery gets completely lost.
Keep these quick sizing rules in mind:
- Optimal Width: Choose a pot with a diameter that is roughly 1/3 to 1/2 the width of our plant’s widest foliage.
- Proper Depth: The planter should be deep enough to comfortably hide the original starter base without the main stem wobbling.
- Visual Balance: Taller indoor trees need deeper, heavier pots for stability, while smaller tabletop greenery looks best in shallow, tailored bowls.
Selecting Authentic and Stylish Containers
The material of the container heavily dictates the vibe of a room. To fool the eye, we always opt for authentic, high-quality textures like matte ceramic, aged terracotta, or woven seagrass baskets.
For instance, pairing a rustic ceramic pot with vibrant, delicate blooms—like our miniature artificial rose buds—instantly brings a natural, refined feel to a living room side table or entryway console.
To finish off the presentation and elevate our styling, remember this simple trick: lay down real soil or stones at the bottom of the pot to make our artificial plants blend more seamlessly into our indoor space. Grounding our stylish container with these raw, natural textures easily bridges the gap between the planter and the faux stems, giving us a flawless display.
Essential Supplies for Styling Artificial Plants
Before jumping into the assembly process, gathering the right materials is the most critical step. Styling a faux plant isn’t just about dropping it into an empty container; it requires a combination of weight, stabilization, and realistic finishing touches to look professional and authentic.
Materials for Base Weight and Stability
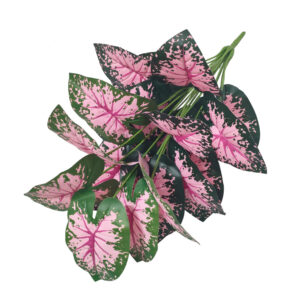
Faux plants, especially taller trees or dense arrangements featuring broad leaves like artificial greenery caladium, tend to be top-heavy. Without a solid foundation, they will easily tip over if bumped by pets, kids, or even a strong draft from the AC. We always start by building a heavy, solid base.
- Pea Gravel or Sand: These materials are inexpensive, easy to find at any local hardware store, and easily conform to the shape of any planter. A few inches of sand or gravel provides excellent ballast.
- Bricks or Large Rocks: For oversized decorative pots, dropping a couple of heavy bricks or large landscaping rocks into the base will anchor the entire setup securely.
Securing Agents Like Foam or Adhesive
Once the pot has enough weight at the bottom, the plant’s trunk or stems need to be locked firmly into place to prevent leaning. If we are arranging thinner, individual pieces like realistic artificial eucalyptus camellia stems, we need precision holding power, while larger trees need heavy-duty anchoring.
- Dry Floral Foam: Dense dry foam blocks can be carved with a knife to fit the planter snugly. The stems push directly into the foam and stay exactly where we position them.
- Expanding Spray Foam: This is our go-to for securing larger plant trunks. Spraying a layer of expanding foam around the base of the plant inside the pot locks the trunk tightly against the sides of the container as it cures and hardens.
- Plaster of Paris: For the ultimate, permanent hold, pouring a mixed layer of plaster over the base materials ensures the plant will never shift or wobble.
Top Dressing and Decorative Fillers
The final layer is what hides the mechanics and fools the eye. It covers up the structural foam, dried plaster, or rocks, providing that vital finishing touch. To achieve the most authentic look, we recommend laying down real soil or stones at the bottom of the pot to make our artificial plants blend more seamlessly into our indoor space.
- Real Potting Soil: Spreading a thin, half-inch layer of actual dirt over a piece of cut cardboard at the top of the pot instantly makes the faux plant look established.
- Preserved Moss: Spanish moss or green sheet moss provides a lush, organic texture that fills gaps beautifully and fits perfectly with traditional decor.
- Decorative River Stones: Polished pebbles or matte river rocks offer a clean, modern aesthetic that works exceptionally well for contemporary spaces and succulent arrangements.
What to Put at the Bottom of an Artificial Plant Pot
To get a truly authentic look, the foundation of the arrangement matters. We always suggest laying down real soil or stones at the bottom of the pot to make our artificial plants blend more seamlessly into our indoor space. Building the right base not only tricks the eye but keeps the decor secure.
Adding Heavy Materials to Prevent Tipping
Some artificial plants come in small, unweighted plastic pots, which makes them very top-heavy. If they are placed directly into a decorative planter, they will wobble or even tip over with the slightest bump. We need to secure them firmly in place.
- River Rocks and Gravel: Pour these directly around the base for a dense, even weight distribution.
- Spare Bricks: Ideal for stabilizing massive, heavy-canopy floor trees.
- Sandbags: Easy to mold right around the central stem.
Even when arranging lightweight stems like vibrant artificial sunflowers inside a larger ceramic vase, placing a few heavy stones at the base ensures the entire display stays upright and safe in high-traffic areas.
Using Recycled Materials to Elevate the Plant
If we are using a deep, oversized planter, filling the entire thing with rocks will make it impossibly heavy to move. Instead, we build a false bottom to lift the plant up to the right height.
- Empty Plastic Bottles: Keep the caps on tightly and stack them inside the base.
- Crushed Cardboard: Sturdy, completely free, and easy to wedge into tight gaps.
- Styrofoam Blocks: Great for taking up bulk space without adding any extra weight.
This spacer trick is a lifesaver when we need to boost shorter, delicate accents like realistic artificial baby’s breath closer to the rim of a deep container so the blooms can overflow naturally.
Ensuring Proper Scale and Proportion
Getting the base height right makes or breaks the lifelike illusion. If the plant sits too low, it looks swallowed by the pot; if it sits too high, the bare stems look awkward.
- The 1/3 Rule: As a general guideline, the planter should make up about one-third of the total height of the display, with the plant making up the other two-thirds.
- Leave Room for Dressing: Adjust the recycled fillers so the top of the faux plant’s original base sits roughly one to two inches below the rim of the decorative container. This leaves the exact amount of room needed to add our finishing top layer of moss, dirt, or decorative stones.
Step-by-Step Guide to Assembling Fake Plants

Transforming a bare faux plant into a realistic interior piece comes down to how we assemble it. We always find that the assembly process is just as critical as the plant itself. If we get this right, nobody will be able to tell the difference between our artificial greenery and the real thing.
Positioning and Centering Your Plant
First impressions matter. If our plant sits too low or off-center, it immediately breaks the illusion. In fact, improper styling is one of the main reasons why people do not use artificial plants for landscaping or indoor design.
- Find the right height: Place the plant in the center of the container. If it sinks too low, elevate it using foam blocks, crumpled craft paper, or an upside-down plastic container.
- Check all angles: Step back and look at the arrangement from different sides of the room to ensure the main trunk sits perfectly straight.
Securing the Stems Firmly
A wobbly plant looks fake and cheap. We need to lock the base in place so the stems stay exactly where we position them.
- Wedge it in: Pack rigid foam or thick cardboard wedges tightly around the base of the plant’s original starter pot.
- Use adhesive for permanence: For high-traffic areas or large trees, we prefer pouring a quick layer of plaster of Paris or using expanding spray foam around the base. This locks the trunk completely and prevents any leaning.
Layering and Compacting the Filler Base
Once the plant is centered and secured, it is time to build out the base. This step provides structural integrity and sets the stage for our decorative top dressing.
- Add weight and realism: To anchor the container and create an authentic foundation, we lay down real soil or stones at the bottom of the pot to make our artificial plants blend more seamlessly into our indoor space. This extra weight also prevents the planter from tipping over if bumped.
- Fill the gaps: Stuff the remaining empty space around the secured base with lightweight recycled materials like plastic grocery bags, bubble wrap, or packing peanuts.
- Compact it firmly: Pack the filler materials down tightly so they do not shift over time.
- Leave room at the top: Stop filling about two inches below the rim of our decorative planter to ensure we have enough space for moss, decorative rocks, or topsoil.
Adding Real Soil and Stones for a Seamless Blend
We always tell our customers that the secret to a high-end faux plant is the finishing touch. We want to lay down real soil or stones at the bottom of the pot to make our artificial plants blend more seamlessly into our indoor space. Mixing natural, organic elements with our artificial greenery is the absolute best hack for tricking the eye and elevating home decor.
Using Real Potting Soil for Authenticity
Using actual dirt is the fastest way to ground our faux plant in reality. We do not need to fill the entire container with heavy soil, just the visible top layer.
- Keep it dry: Use completely dry, standard potting mix to avoid moisture buildup or pests in the living room.
- Layer it thin: A simple half-inch layer over the base is all we need for full coverage.
- Pack it tight: Press the soil firmly around the faux trunk so the plant looks naturally established in the dirt.
Enhancing Visual Texture with Natural Stones
If we want a cleaner look without the potential mess of dirt, natural stones are a perfect alternative. They provide excellent top-weight stability and deliver a sleek, modern aesthetic.
- River Rocks: These offer a smooth, polished finish that is ideal for styling larger floor plants.
- Pea Gravel: Works exceptionally well for smaller tabletop plants or contemporary arrangements.
- Lava Rock: Adds an earthy, rugged texture that looks highly authentic and organic.
Incorporating Moss and Eco-Friendly Accents
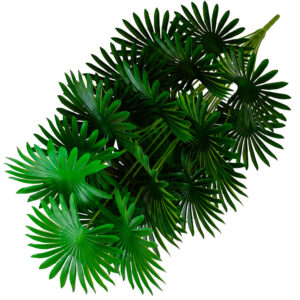
Moss is our go-to filler for hiding structural gaps, masking foam edges, and softening the transition from the pot to the stems. Adding a layer of preserved Spanish moss or vibrant green sheet moss around leafy bases—like styling simulated artificial Persian fern green plants—instantly elevates the realism of the display. It brings in that final layer of lush, eco-friendly texture that makes the entire arrangement look effortlessly alive.
Maintaining and Securing Styled Artificial Plants
Once we have our faux greenery perfectly styled, the focus shifts slightly to preservation. A well-arranged fake plant only looks as good as how it is maintained. Whether our arrangement is sitting on a breezy backyard patio or tucked into a cozy living room corner, a little routine upkeep goes a long way to keep the illusion authentic year-round.
How to Secure Fake Plants in Outdoor Spaces
Taking faux plants outside means we have to contend with the elements, especially the wind. If we live in an area prone to strong gusts, relying on a lightweight plastic pot is a recipe for disaster. Here is how we make sure outdoor faux plants stay firmly in place:
- Upgrade to a heavy outer planter: Always drop the lightweight original starter pot into a sturdy, heavy ceramic, fiberglass, or concrete planter.
- Weigh down the base heavily: Fill the empty void around the starter pot with dense materials. Bricks, large river rocks, or bags of play sand provide excellent low-center-of-gravity weight.
- Utilize expanding foam: For permanent outdoor fixtures on a porch or deck, locking the base into the heavy planter with outdoor-rated expanding polyurethane foam stops the plant from shifting entirely.
- Stake them directly: If we are “placing” artificial shrubs directly into garden beds, drive a wooden or metal stake deep into the ground and secure the main stem to it using heavy-duty zip ties before covering the base with mulch.
Routine Cleaning and Dusting Tips
Nothing gives away a fake plant faster than a visible layer of household dust. Real plants are often rinsed by rain or watering, so our artificial ones need a bit of manual intervention to stay looking fresh. Remember, we can lay down real soil or stones at the bottom of the pot, but if the leaves are coated in grime, the realism is instantly lost.
- Routine weekly dusting: Make it a habit to grab a microfiber cloth or a standard feather duster to gently wipe down the broad leaves during regular house cleaning.
- The blow dryer trick: For intricate foliage or tightly grouped stems, use a hair dryer on the coolest setting to blast away loose dust from hard-to-reach crevices.
- Deep cleaning with a damp cloth: If the plant sits near a kitchen, we occasionally need to wipe it down with a damp microfiber cloth and a tiny drop of mild dish soap. Always avoid harsh chemical cleaners that could strip the UV coating or fade the colors.
Updating Top Fillers Seasonally
One of our favorite tricks to keep faux plants looking dynamic and lifelike is swapping out the top dressing as the seasons change. Real plants change with the weather, and updating our fillers mimics this natural cycle, keeping guests totally fooled.
- Spring and Summer vibes: Stick to bright green preserved sheet moss, light-colored decorative pebbles, or fresh-looking light wood mulch.
- Fall and Winter warmth: Transition the base to darker pine bark, add small pinecones, or layer in subtle seasonal accents. For instance, incorporating a warm-toned artificial fruit bouquet of pomegranates near the base of an indoor olive tree instantly gives the home a cozy, harvest-ready feel.
- Clear out the old debris: Whenever we swap our top fillers, take a quick moment to vacuum out any accumulated dust or pet hair that has settled inside the pot before layering the new material on top.
How we support you:
🌿 Performance: 98% Highly realistic, low maintenance, no watering, no seasonal damage.
🛡️ Safety: Fire Retardant & UV Resistance options to meet strict commercial codes.
🏭 Capability: OEM/ODM custom designs with Flexible MOQ supporting projects of all scales.
Looking to elevate your next landscaping or interior project? Connect with us for a consultation. At Meiyi, we specialize in providing high-end, realistic greenery solutions tailored for both residential and commercial real estate.